
Ready to switch to the brave new world of iPhone? Or maybe you're already converted, but about to upgrade to a newer, better model - like one of the iPhone 18 family.
Whatever your situation, here's a quick list of very important first-day tasks that'll help you survive the move to the latest iPhone.
Backing up your old iPhone
Having a backup of as much of your own data is always a good idea, whether that's emails, business contacts, or just the apps you love to use every day. That doesn’t automatically mean you have to delete the data, but having it safely stored can make it easier to transfer to your new iPhone.
You can backup via Apple’s own iCloud service, or by plugging your old phone into a PC or Mac.
On a PC, you’ll need Apple’s iTunes app. Connect your iPhone with its relevant cable (USB-C for newer models, Lightning for older ones) to your computer, and select Summary. Choose Back Up Now and follow the prompts to create a backup.
If you’re using a Mac, you can back up through macOS Finder, as long as you’ve got a connection cable (USB-C or Lightning for older iPhones) to connect with. Select your iPhone from the Finder side panel, then select the option to create a backup on your Mac.
Setting up your new iPhone
From taking it out of the box to transferring all of your old files, here's everything you need to know about setting up your new iPhone.
First steps: Powering on
Before you power it on, insert your physical SIM card (if you're using one). Use the supplied SIM pin tool to pop open the SIM card slot on the side of the iPhone, drop your SIM card into the phone and proceed. If you’re instead going to use an eSIM only, you can skip this step.
Brand new iPhones do typically have enough charge for setup out of the box, though if you’ve purchased a unit that’s been sitting on a dusty warehouse shelf for a long time, it could be flat.
You should see an Apple logo and a friendly Hello message that rotates through the many languages that iOS, the operating system that runs iPhones, supports. Swipe upwards to start the setup process.
Should you use Quick Start?
If you’ve got an existing iPhone running iOS 11 or better that you’re upgrading from to your new iPhone, you can now use Apple’s very handy Quick Start feature. This makes it easy to shift the details and most of the data on your old iPhone over to your new one.
To use Quick Start, you’ll need to have your old iPhone nearby, powered on (or plugged into a charger if its battery won’t hold much power any more) and connected to your Wi-Fi network with Bluetooth on.
Bringing your old iPhone near your new iPhone should result in a small pop-up icon appearing on your old phone’s screen, asking if you’d like to use your old device to set up your new one. You’ll need to verify your existing iPhone’s password to start the transfer process.
The process here can take some time depending on the quantity of data involved, but the benefit here is that most of the setup that you’ve already got in place on your existing iPhone (including most photos, email accounts, some apps and their data and your known Wi-Fi networks) will all be sent from your old phone to your new one.
Can I use Quick Start if I'm switching from Android?
If you’re coming from Android, you can’t use Quick Start strictly speaking, but Apple does have an application designed to make the shift from Android to iOS relatively seamless.
That app is not-so-inventively called Move to iOS, and it’s available from the Google Play store. If you want to more easily shift data from your existing Android device, download it from Google Play onto your existing Android phone.
Move to iOS can make the process of getting your data from your Android phone over to your new iPhone fairly painless. Though like any app, it can misbehave, and some users do report issues with slow transfers or the app crashing out on them. Take your time, have patience and ideally restart your Android phone before commencing the Move to iOS process to give yourself the best odds of shifting over with minimal issues.
Activating your iPhone
The next step in the setup process is to activate your iPhone on either Wi-Fi or a mobile network. At one time, Apple absolutely required the presence of a SIM card to activate any iPhone, but if you do happen to be waiting on a physical SIM card (or eSIM details), you can still get your iPhone set up with Wi-Fi.
Setting up Face ID
Apple uses its front-facing Face ID system for unlocking and verifying purchases, so you'll be asked to set up Face ID on your new device. The Face ID enrolment process relies on you setting a secondary passcode in case it can’t recognise your face, and you can also choose not to use Face ID if you’d rather not at this point.
The process during setup is simple enough, involving putting your face in front of the screen and rotating your head around lightly so that it can build up a 3D image of your visage.
Sign in with your Apple Account
If you didn’t use Quick Start, it’s at this point where you’ll need to sign in with your Apple Account. If you haven’t already set one up, you do have the option to do so directly from your iPhone at this stage
If this is your very first Apple product, you will need an Apple account to set up your iPhone, and this is not an optional step. Head over to Apple’s account web page, create your account (along with a strong password) and take note of your username and password, because you’ll need them.
Clearing your old iPhone
If you’re getting rid of your old iPhone – whether you’re gifting it to a family member, trading it in to lessen the cost of your new handset or selling it yourself – once you’ve set up your new iPhone, it’s important to clear the old one. This keeps your own personal data safe and secure, as well as ensuring that the new owner or user can activate it themselves when it’s time for them to set it up.
From your old iPhone, open up the Settings App, and tap on General. From there, choose Transfer or Reset iPhone, which you’ll find near the bottom of the list of options. You’ll typically need to enter your phone’s passcode or Apple Account password (depending on the version of iOS you’re clearing from) and confirm that you do want to continue with the resetting process. Be fully aware at this point that if you haven’t backed up your own data from your iPhone, it will be wiped after you hit continue.
Once your iPhone has finished resetting itself, it should restart and present the setup Hello message to you, at which point it’s safe to dispose of it however you see fit.
New iPhone tips and tricks
There are many ways you can change up the way your iPhone works. Here are five of our favourite customisations and tips for new iPhone owners:
- Use accessibility features for a smarter iPhone: Apple provides several features to iPhone owners with disabilities, which is superb in itself. One of our favourites is Back Tap, which lets you use a double or triple tap on the back of the phone to launch apps, invoke Siri or start just about any other shortcut you’d care to name. You can find it under Settings > Accessibility > Touch > Back Tap.
- The Action Button isn’t just for muting: All new iPhone models feature the Action Button, replacing the Ring/Silent switch on older models. You can still use it just to mute sound on your iPhone, but it’s a much more powerful input than just creating silence on command. Head to Settings>Action Button. Apple has a bunch of predefined actions in place if you want to keep it simple, but by creating Shortcut Actions, you can make the Action button bring up an entire menu of choices, giving it a lot of flexibility and power.
- Customise Control Centre: Swiping down from the top right of an iPhone brings up Control Centre, Apple’s handy collection of tools for brightness, Wi-Fi and screen mirroring, to name but a few. Control Centre is good, but you can make it far more useful by adding new controls that you actually use, or removing ones you don’t. Doing so is quite easy; open Control Centre by swiping down from the top right, then press and hold on an empty area of the screen to add or remove controls as desired.
- Hide apps behind Face ID: If you’ve got an app that you want locked away, whether it’s a personal finance app for only you, or a game you don’t want your kid playing, you can hide it in iOS, requiring Face ID unlocking to use. It won’t show up in your regular app panes, instead being in a new “Hidden” group at the bottom of your app library. Hiding is easy to do; long-press on the app you’d like to hide and choose “Require Face ID” to shuffle it away to relative obscurity.
Find the best plan for your new iPhone
Whether you’ve opted for a shiny new iPhone 18 Pro, or the pricier iPhone Duo, you’ve just spent a fair amount of money doing so.
It makes the most sense to get the best value deal for your new smartphone to go with it, via the best SIM-only plans on the market. If you’ve purchased your iPhone 17 outright, here’s a range of the most popular SIM-only plans to choose from.
|
#1
|
SpinTel

Editor's Pick
$23 Mobile Plan
$12.00/mth
Min. cost $12
|
|
#2
|
Tangerine Telecom

30GB 5G Mobile SIM
$30.00/mth
Min. cost $15
|
|
#3
|
Pivotel

25GB Mobile Swift Plan
$11.45/mth
Min. cost $11.45
|
|
#4
|
Dodo

Editor's Pick
Medium Mobile Plan
$30.00/mth
Min. cost $15
|
|
#5
|
Swoop

30GB SIM Only 5G
$14.00/mth
Min. cost $14
|
|
#6
|
Optus

$60 Optus Choice Plus Plan
$39.00/mth
Min. cost $39
|
|
#7
|
Vodafone

$58 Small SIM Only Plan
$45.00/mth
Min. cost $45
|
|
#8
|
Moose Mobile

Moose 23 SIM Only
$14.00/mth
Min. cost $14
|
|
#9
|
Telstra

$84 Essential Upfront SIM Plan
$84.00/mth
Min. cost $84
Link not supplied
|
|
#10
|
Belong

25GB Mobile Plan
$34.00/mth
Min. cost $34
Link not supplied
|

Still on the fence about picking up an iPhone 18 and want to split the cost out over 24 or 36 months? Compare 36-month mobile plans and deals for the iPhone 18 Pro and iPhone 18 Pro Max below.
Compare 36-month mobile plans and deals for the iPhone 18 Pro and iPhone 18 Pro Max below.
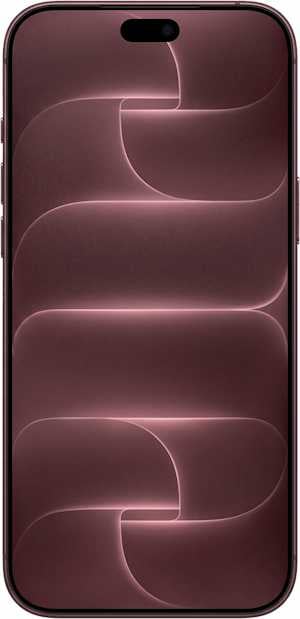
iPhone 18 Pro 256GB Plans
|
#1
|
Optus
Editor's Pick
$60 Optus Choice Plus Plan
$97.30/mth
Min. cost $2,137.80
|
|
#2
|
Vodafone
$58 Small Plan
$103.30/mth
Min. cost $2,143.80
|
|
#3
|
Vodafone
$68 Medium Plan
$108.30/mth
Min. cost $2,148.80
|
|
#4
|
Vodafone
$78 Large Plan
$113.30/mth
Min. cost $2,153.80
|
|
#5
|
Optus
$79 Optus Launch Plus Promo Plan
$117.30/mth
Min. cost $2,157.80
|
|
#6
|
Optus
$70 Optus Choice Plus Plan
$128.30/mth
Min. cost $2,168.80
|
|
#7
|
Telstra
$74 Basic Upfront Mobile Plan
$132.30/mth
Min. cost $2,172.80
Link not supplied
|
|
#8
|
Telstra
$84 Essential Upfront Mobile Plan
$142.30/mth
Min. cost $2,182.80
Link not supplied
|
|
#9
|
Optus
$90 Optus Choice Plus Plan
$148.30/mth
Min. cost $2,188.80
|
|
#10
|
Telstra
$99 Premium Upfront Mobile Plan
$157.30/mth
Min. cost $2,197.80
Link not supplied
|
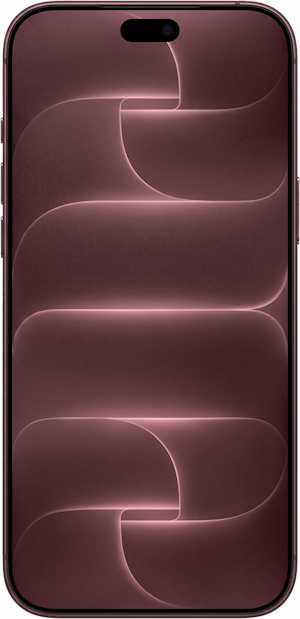
iPhone 18 Pro Max 256GB Plans
|
#1
|
Optus
$60 Optus Choice Plus Plan
$102.86/mth
Min. cost $2,337.96
|
|
#2
|
Vodafone
$58 Small Plan
$108.86/mth
Min. cost $2,343.96
|
|
#3
|
Vodafone
$68 Medium Plan
$113.86/mth
Min. cost $2,348.96
|
|
#4
|
Vodafone
$78 Large Plan
$118.86/mth
Min. cost $2,353.96
|
|
#5
|
Optus
$79 Optus Launch Plus Promo Plan
$122.86/mth
Min. cost $2,357.96
|
|
#6
|
Optus
$70 Optus Choice Plus Plan
$133.86/mth
Min. cost $2,368.96
|
|
#7
|
Telstra
$74 Basic Upfront Mobile Plan
$137.86/mth
Min. cost $2,372.96
Link not supplied
|
|
#8
|
Telstra
$84 Essential Upfront Mobile Plan
$147.86/mth
Min. cost $2,382.96
Link not supplied
|
|
#9
|
Optus
$90 Optus Choice Plus Plan
$153.86/mth
Min. cost $2,388.96
|
|
#10
|
Telstra
$99 Premium Upfront Mobile Plan
$162.86/mth
Min. cost $2,397.96
Link not supplied
|
Alex Kidman
Freelance Contributor

Related Articles


